My tiny guest room used to swallow my workouts. Equipment on the floor. No light. I learned one rule: open sightlines matter more than filling every square foot. I spent about $350 on key pieces and the room now feels twice the size and works for strength, yoga, and cardio. Here’s exactly how I built a home gym in a small room that feels spacious.
Quick context: This is a minimalist, functional gym plan. Budget: $250–$500 depending on gear. Works for rooms 6×8 to 9×10 feet. The plan leans on vertical storage and circadian LED light to keep the space bright and focused.
What You'll Need for This Look
Foundation pieces:
- Full-height frameless mirror 72×30 inches (~$100-180) — for form and depth
- 4×6 rubber gym mat, black (~$60-120) — protects floor and reduces noise
Flooring & zones:
- Interlocking foam tiles 24×24, set of 6, charcoal (~$60-120) — foam for mobility/yoga zone
- 4×6 woven zone rug, low pile, gray (~$40-90)
Storage & equipment:
- Pegboard wall kit 24×48 with hooks (~$40-100) — keeps floors clear
- Wall-mounted dumbbell rack, 3-pair capacity (~$60-150)
- Foldable adjustable weight bench, black (~$80-160)
Accessories & mood:
- Adjustable kettlebell set (5–35 lb range) (~$70-140)
- Resistance band set with door anchor (~$15-35)
- Circadian LED light strip, white-to-warm, 16.4 ft (~$40-100)
- Sansevieria snake plant, live, 3–4 ft (~$25-60)
Budget-friendly swap: If you need to cut cost, get foam interlocking tiles for the whole floor instead of rubber mats.

Start with the foundation: Flooring and mirrors

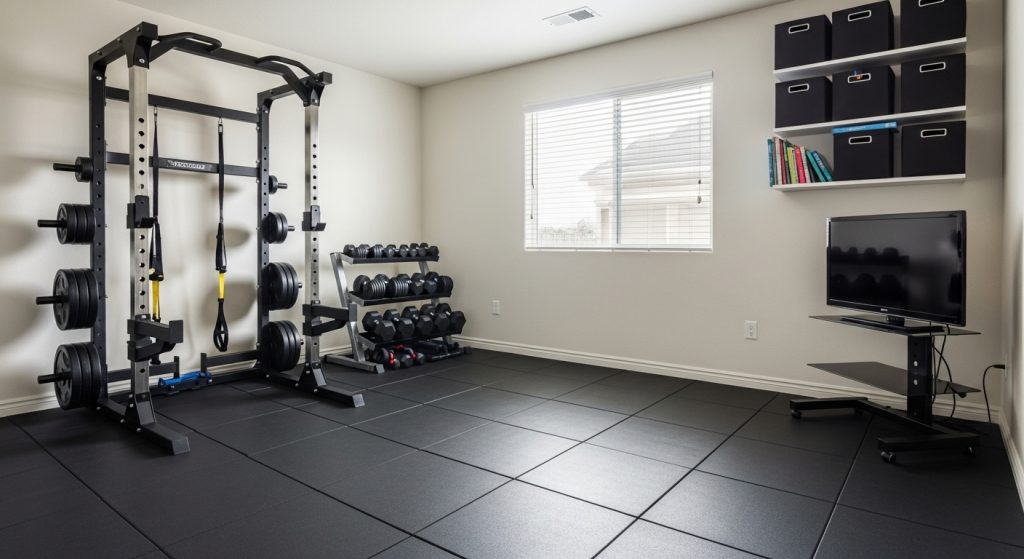
The floor and mirror set how roomy the gym feels. I started with a 4×6 rubber gym mat under the strength zone. It protects the floor and muffles impact. For the mobility area I ran a small patch of interlocking foam tiles — softer for yoga but thin enough to keep balance cues intact.
I leaned a 72×30 full-height mirror against the wall rather than mounting it. It visually doubles the depth and gives me immediate form feedback. Place the mirror opposite or adjacent to the main light source to bounce daylight. The common mistake is a mirror that’s too small; go at least 5–6 feet tall if possible. I once painted one wall charcoal thinking it would feel studio-like. It closed the room. I removed the paint and added the mirror instead — the space opened up.
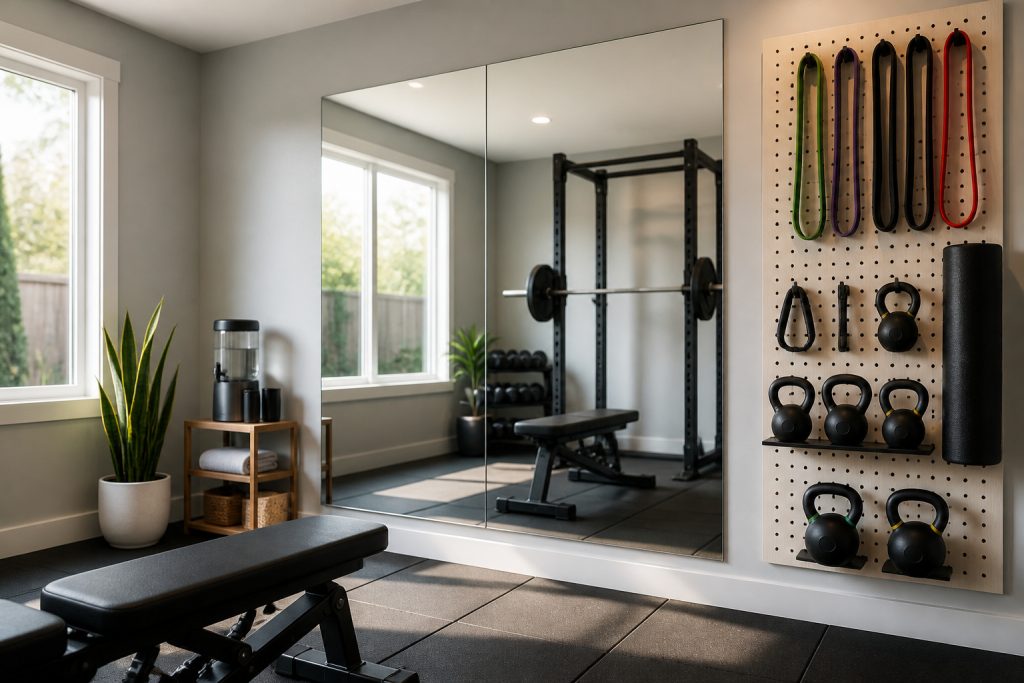
Maximize space with vertical storage and smart layout

Once the floor is set, free the floor. I installed a pegboard wall kit 24×48 and used S-hooks for kettlebells, bands, and a folded yoga mat. Hooks keep equipment visible and off the floor. For weights I used a narrow wall-mounted dumbbell rack that holds three pairs; it tucks into a corner and reads like wall art.
Arrange zones in an L-shape if the room is narrow: strength along one long wall, mobility/yoga near the window. Keep the bench foldable — I use a foldable adjustable bench that slides under a shelf when not in use. The visual principle is vertical prioritization: build up, not out. Avoid stacking mismatched storage bins; choose uniform baskets or small floating shelves for tidy sightlines.
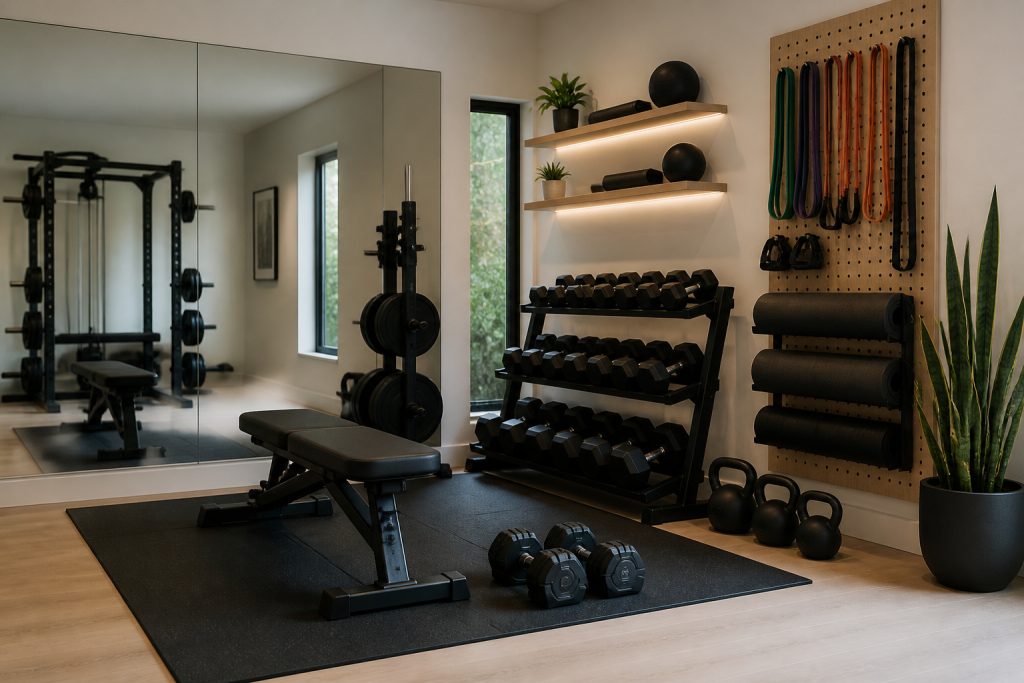
Create mood and focus with layered lighting and plants

Lighting determines how inviting the room feels. I installed a circadian LED strip, white-to-warm above the mirror and under one shelf. Bright, cool white for morning sessions. Warmer tones for evening stretches. Layer a small bedside-style lamp if you need a soft fill.
Plants keep air pleasant and add a vertical visual break. I placed a Sansevieria snake plant in the alcove; it tolerates lower light and handles humidity. The feeling is controlled and boutique-like, not cluttered. One error I made: too many colored foam tiles. It became visually busy. I swapped to charcoal tiles and one gray rug to define the zones.
Common Styling Mistakes to Avoid
Mistake: Equipment piled in the center
Why it doesn't work: It blocks movement and sightlines.
Do this instead: Use a pegboard wall kit and hang bands, ropes, and mats.
Mistake: Small mirror or mirror placed poorly
Why it doesn't work: You miss form cues and lose depth.
Do this instead: Use a full-height mirror 72+ inches opposite light.
Mistake: Skipping proper floor protection
Why it doesn't work: Noise and damage travel through floors.
Do this instead: Add a 4×6 rubber gym mat under heavy lifts and foam tiles for bodyweight work.
Shopping Guide: Where to Find These Items
- Budget flooring on Amazon: Search interlocking foam tiles for a low-cost mobility surface.
- Splurge on the mirror, save on gear: A good mirror lasts. Look for full-height frameless mirrors.
- Pegboards for renters: Pick a freestanding or no-damage pegboard wall kit if you can’t drill.
- Plants that survive gyms: If light is poor, consider an artificial Sansevieria that still reads real.
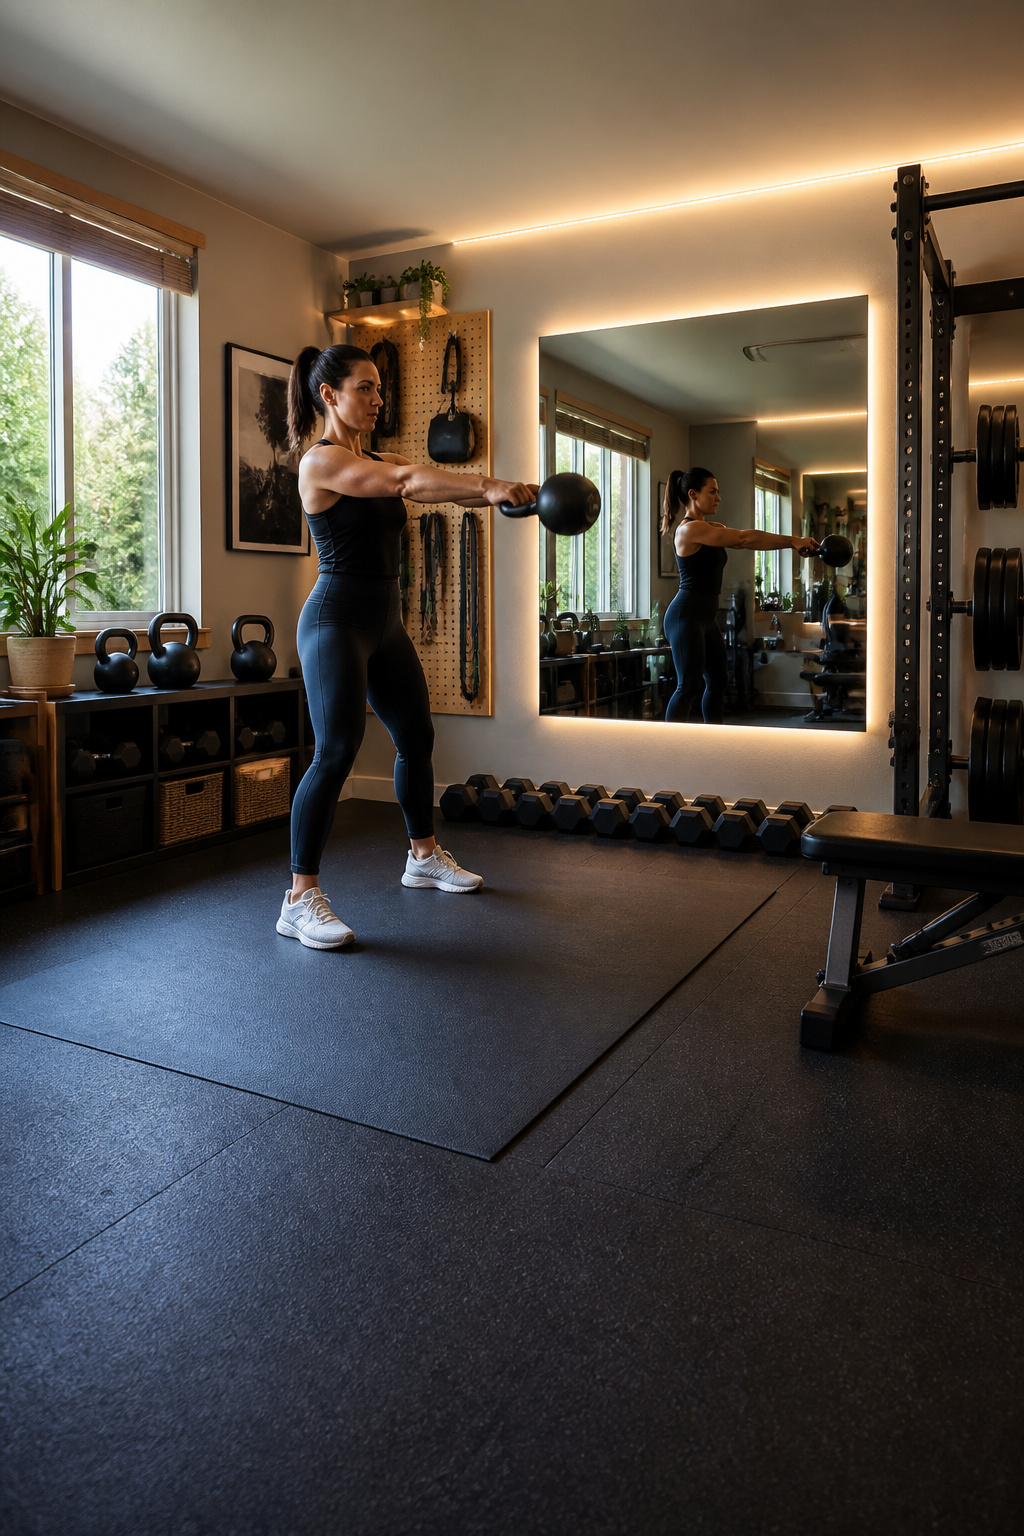
Start small. Add the mirror and a rubber mat first. Then layer storage and mood lighting. I added the adjustable kettlebell set last and it made the space feel complete. What’s the first piece you’ll add to your room?