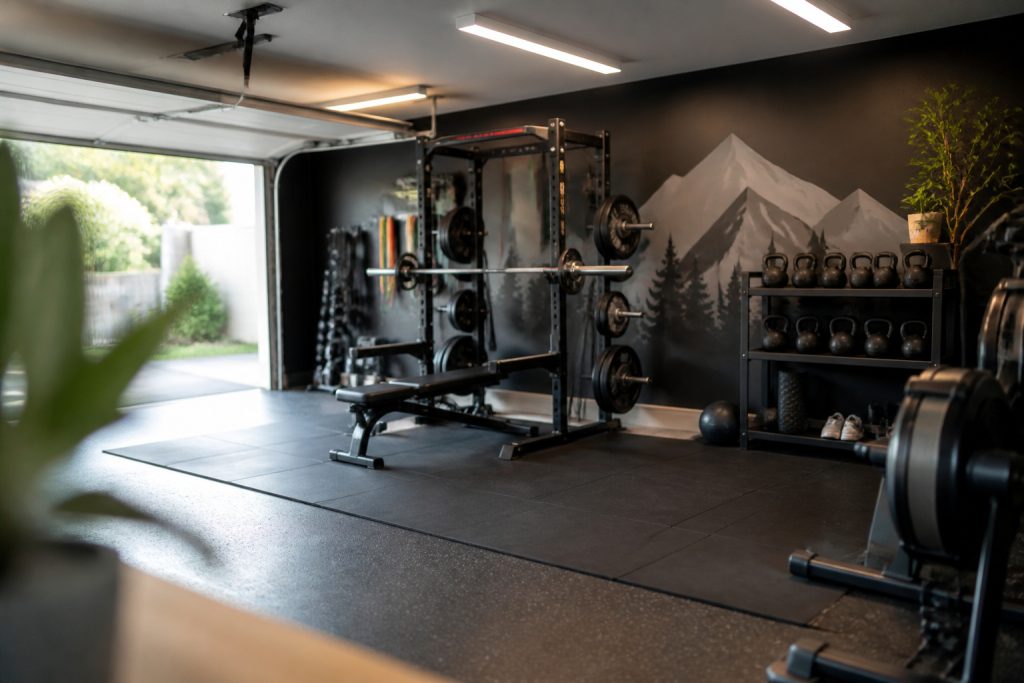
My garage used to be two things: a dumping ground and a cold slab of concrete. I wanted a serious strength space that felt like a proper gym, not a makeshift corner. I spent about $1,000 building a half-garage setup that holds a rack, bench, and a stable lifting platform. The key was zoning the floor and treating walls like storage, not decoration.
Quick context: This guide is for industrial-minimalist garage gyms. Budget: $500–$1,500 depending on rack and platform choices. Best for half-garage or single-bay garages. Trend to follow: multi-functional gear and rubber flooring for clear workout zones.
What You'll Need for This Look
Foundation pieces:
- Horse stall mats, 4’x6’ heavy duty rubber mats (buy 4–6; ~$40–$60 each)
- Rolled rubber floor mat, 4mm or 6mm, black (for cardio/parking divide; ~$80–150)
Strength equipment:
- Squat rack, half rack, steel (one; $250–900)
- Adjustable weight bench, incline/decline (one; $80–250)
- Adjustable dumbbells set, 5–50 lb pair (one set; $80–200)
- Barbell and beginner weight plate set, 20kg/45lb bar (pair with rack; $150–400)
Accessories & storage:
- Pegboard garage storage panel with hooks (use 2–3 panels; $40–100)
- Kettlebell set or single 16–32 kg kettlebell (one shelf; $30–100)
- Resistance bands set with door anchor (~$20–40)
Lighting & finishing:
- LED shop light 4-foot strip, daylight 5000K (2–3 fixtures; $30–80 each)
- Plyo box wooden 20x24x30-in (~$50–90)
Budget-friendly swap:
- If stall mats are out of reach, use interlocking foam tiles, 1” thick for non-heavy-lift zones (~$50–120).

Start with safe flooring: rubber zones for lifting
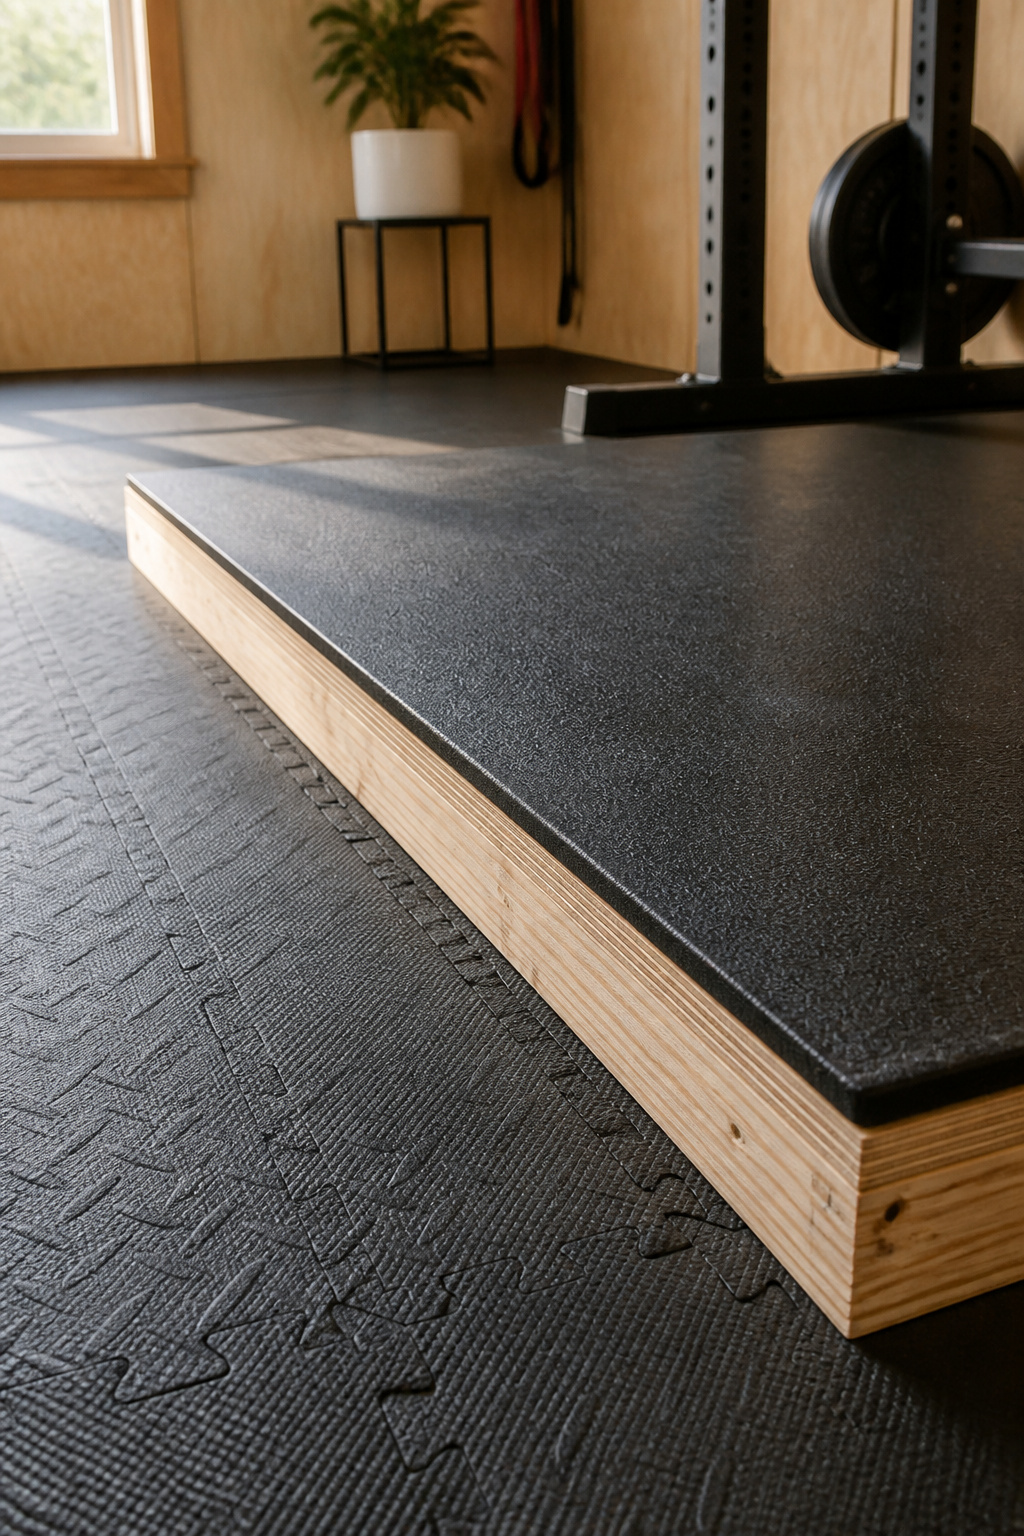
The floor is the most important styling choice. I built a 4×8 ft DIY platform by laying 3/4" plywood over a sublayer and topping it with horse stall mats. It gives the feel of a pro gym and protects the concrete. For the rest of the half-garage I used rolled rubber floor mats in a different texture to create a visual border. The result: clear lifting zone, clear accessory zone. Measure the door swing and car space before you lay mats. One mistake I made was buying thin interlocking foam for deadlifts—they compressed and curled. I upgraded to thicker stall mats and the platform feels solid. Aim for at least 3/4 inch total rubber under your deadlift bar.
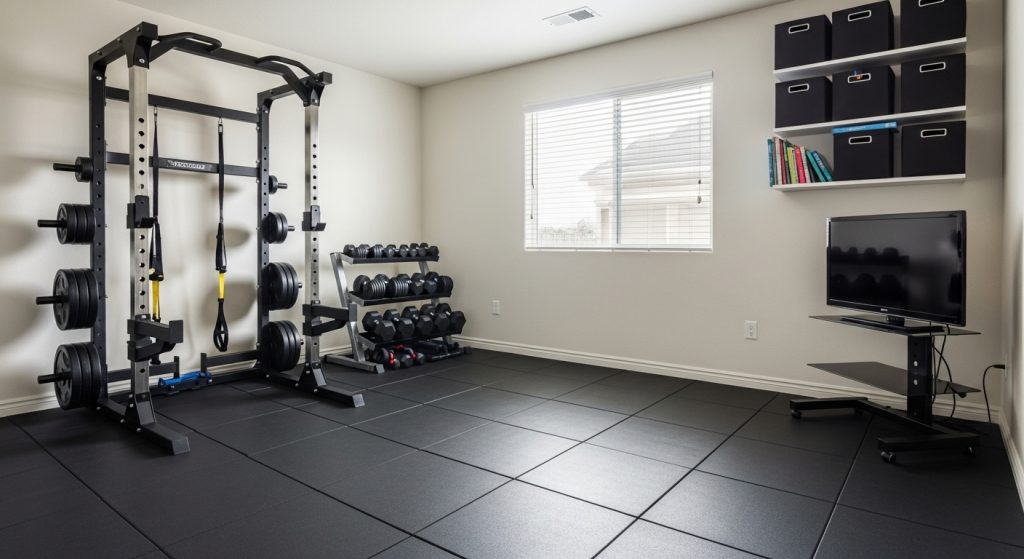
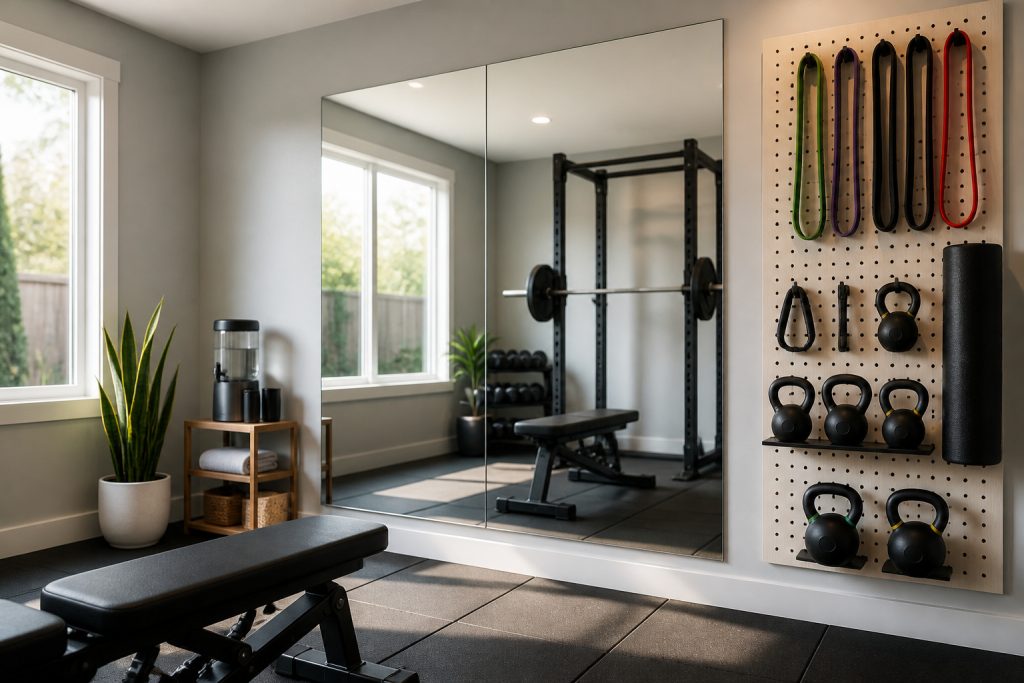
Maximize storage: vertical racks and neat gear clusters

My walls became storage. I installed a pegboard garage storage panel system and used heavy-duty hooks for barbells and bands. A narrow shelf holds kettlebells and plates. The visual trick: group gear by function. Put free weights on lower shelves, bands and mobility items higher. Keep cardio gear (bike or rower) in its own zone on the opposite side of the garage mat line. I also added a foldable weight bench so the space clears for a parked car when needed. Clustering gear saves floor space and makes the gym look intentional.
Outfit for performance: rack, bench, and versatile gear

Choose a squat rack that fits your ceiling height and leaves 2–3 ft clearance behind for bench presses. I picked a compact half rack and paired it with an adjustable weight bench that locks into incline positions. For small spaces, adjustable dumbbells cover multiple loads without more racks. Add a pull-up bar or wall-mounted rig above the rack if possible. Lighting matters for safety: bright LED shop lights at 5000K cut shadows and make heavier lifts easier to track. I first bought a cheap bench that wobbled under heavy presses; swapping to a sturdier model was worth the extra cost.

Common Styling Mistakes to Avoid
Mistake: leaving the floor bare
Why it doesn't work: concrete is cold, slippery, and damages plates.
Do this instead: cover lifting and accessory zones with rubber mats or stall mats.
Mistake: storing plates and kettlebells on the floor in front of the rack
Why it doesn't work: trips and clutter.
Do this instead: use wall hooks and a low shelf. Try pegboard hooks and shelving.
Mistake: one light source
Why it doesn't work: shadows hide barbells and form issues.
Do this instead: install 2–3 LED shop lights and a focused lamp over the rack.
Shopping Guide: Where to Find These Items
- For flooring, check Traction Supply-style listings or search Amazon for horse stall mats for cheap, durable options.
- For multi-use gear, adjustable dumbbells and resistance bands give the most bang per dollar.
- If you want resale value, opt for known brands like Rogue for bars or racks; search squat rack steel heavy duty if shopping used or new.
- For lighting and small hardware, Amazon has reliable LED shop lights at sensible prices.
Start with the floor and a good rack. That combination sets the look and function. I added a plyo box and some bands later, and the gym felt complete. Which piece will you order first?