My spare room used to hold boxes and a forgotten futon. I wanted a usable gym but not a cold basement. I spent about $420 to get the basics in place and focused on three things: padding underfoot, a mirror for form, and tidy vertical storage. That small investment made the room usable daily.
This guide shows how to turn a spare room into a home gym in a warm, modern way. Style leans modern-functional with warm wood accents. Budget: $300–700 depending on equipment. Applies to small spare rooms (8×10 to 10×12). Trend to follow: rubber gym flooring + warm wood textures and circadian LED lighting for workouts and recovery.
What You'll Need for This Look
Foundation pieces:
- 4×4 interlocking rubber gym flooring tiles, black, 6mm (~$120 for 8 tiles, covers 16 sq ft)
- Full-length leaning mirror, 24×72 inches, black frame (~$90-150)
Equipment:
- Adjustable dumbbells 5-50 lb pair (~$250)
- 16 kg cast iron kettlebell, powder coat (~$40-60)
- Foldable exercise bike compact model (~$150-350)
Movement essentials:
- High-density yoga mat, 72×24 inches, charcoal (~$30-50)
- Resistance band set with door anchor and handles (~$20-35)
- Suspension trainer kit (TRX-style) (~$40-90)
Storage & finishing:
- Wall-mounted pegboard storage system, 48-inch (~$40-80)
- LED hexagonal light panels starter kit (color + white modes) (~$90-160)
Budget-friendly swap:
- If you skip adjustable dumbbells, get a resistance band set and a single kettlebell to save ~$150.

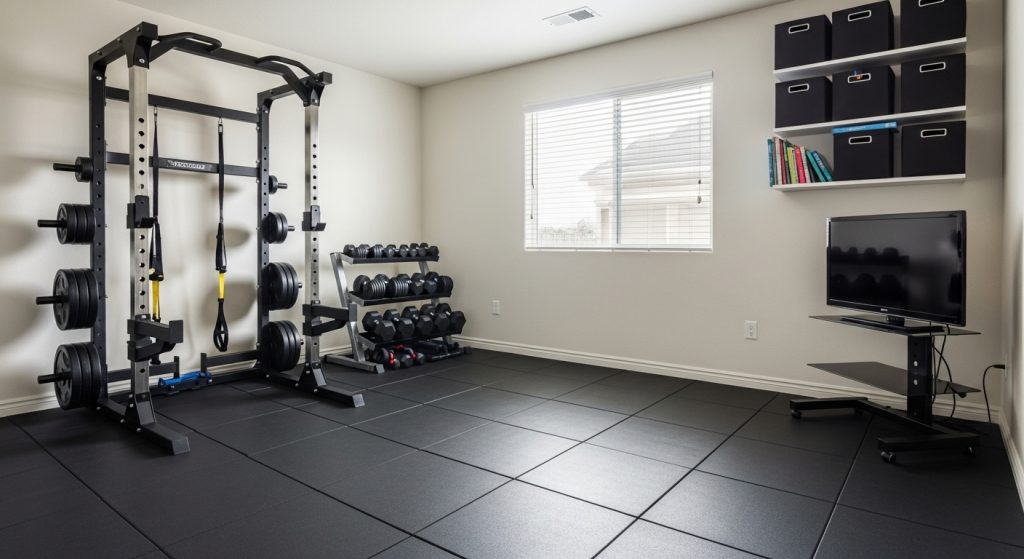
Start with the Foundation: Rubber flooring and mirror that expand the room

Floor and mirror shape everything. I laid 6mm interlocking rubber tiles first because they protect the subfloor, dampen noise, and give a clean backdrop. For an 8×10 room, buy enough tiles to cover the area where you’ll move—roughly 24–30 sq ft. I used 4×4 rubber tiles and trimmed a couple with a utility knife for a flush fit.
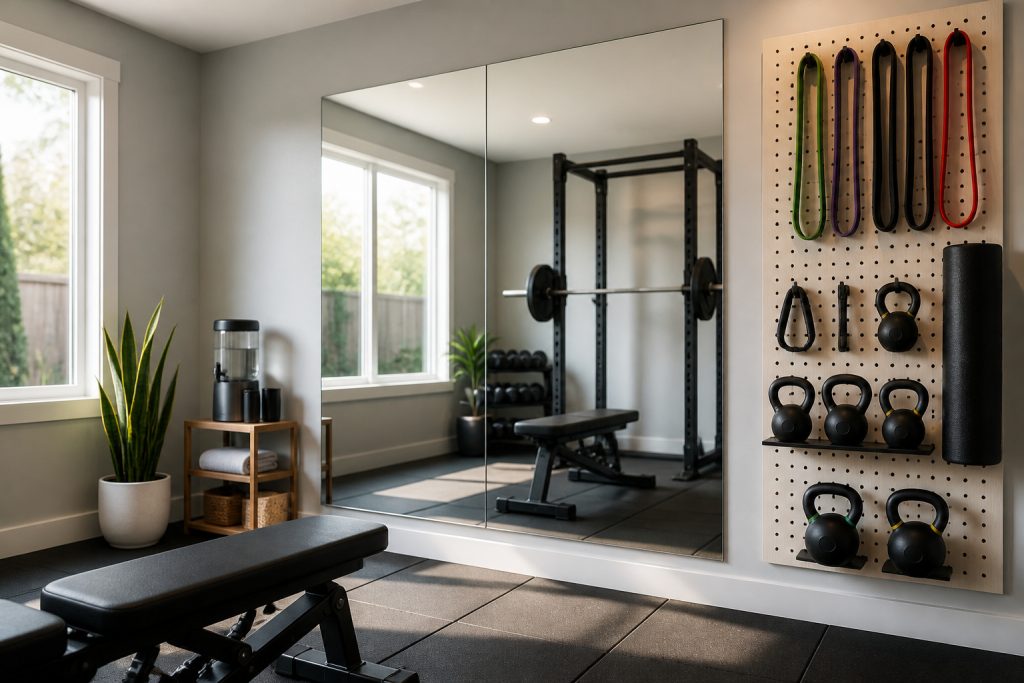
Place a full-height leaning mirror opposite your main movement zone or next to the weights. A 24×72 leaning mirror gives enough view for squats and presses. Visual principle: low, heavy floor + vertical reflective plane makes the room feel larger and more professional.
Common mistake: buying a mirror that’s too small. It gives only partial feedback and looks cheap. Go for at least 24×60 for real use.
Zone the Room: Strength, cardio, and stretch areas for safe movement

Divide the room into three micro-zones. I keep strength along one wall with the adjustable dumbbells 5-50 lb and a 16 kg kettlebell on a small mat. Cardio (my foldable bike) tucks beside the window. The center is a 3–4 ft clear space for mobility and yoga with my high-density yoga mat.
Visual principle: keep lanes clear. Leave at least 36 inches in front of equipment for safe exits. Use the mirror so the stretching zone aligns with your line of sight. One mistake I made: placing weights in the middle of the floor. The room felt crowded. I moved them to a vertical rack and reclaimed flow.
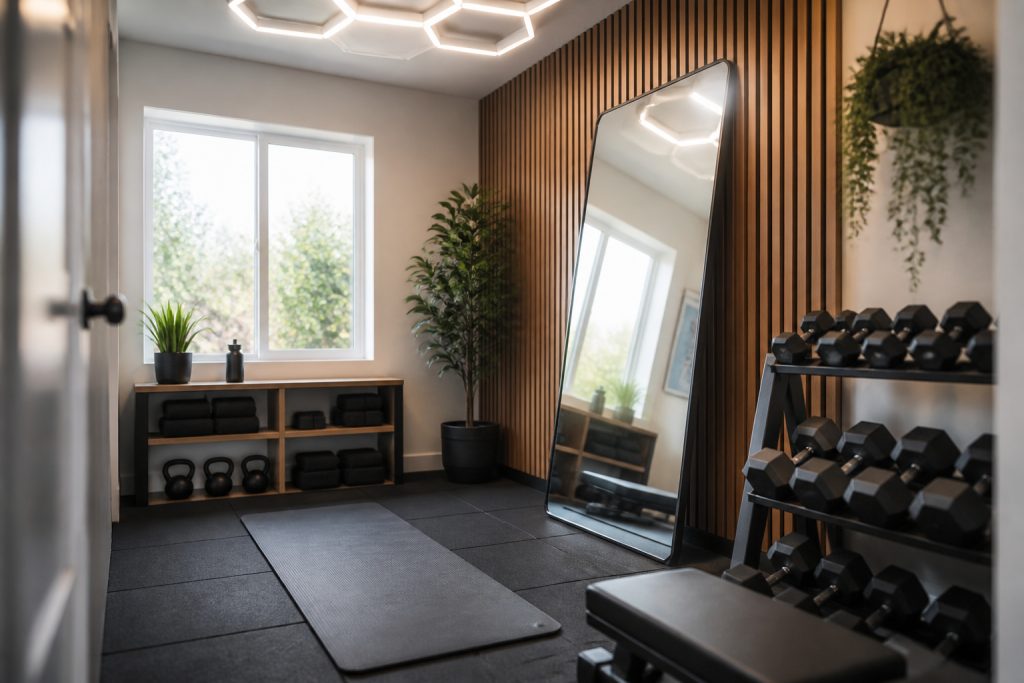
Create Ambiance with Circadian lighting and warm accents

Lighting affects performance. I installed a small LED hex panel kit set to bright white for morning sessions and to amber for cool-downs. Layer a bright overhead or daylight bulbs near the cardio spot (5000K), and use warmer tones by the mirror post-workout.
To avoid the basement vibe, I fixed a slim warm wood slat panel behind the mirror. The wood drew the room toward a wellness look. I tried plain charcoal paint first; it made the space feel closed. The slat wall solved that.
Keep Gear Tidy: Vertical storage and display that motivates

Vertical storage is the unsung hero. I mounted a 48-inch pegboard storage system for bands, jump rope, and towel hooks. A narrow shelf holds a water bottle and my workout log. For small rooms, use wall-mounted racks for dumbbells or a compact stand near the corner.
Add a small motivational gallery: one framed race bib or quote opposite the mirror. It helps on low-energy days. Also, a coat-rack style peg near the door works great for resistance bands and jump ropes.
Common Styling Mistakes to Avoid
Mistake: Stacking everything on the floor
Why it doesn't work: Floors get cluttered, movement feels unsafe.
Do this instead: Go vertical with a pegboard and hooks.
Mistake: Too-bright overhead light only
Why it doesn't work: Causes glare in mirrors and drains energy.
Do this instead: Layer with LED hex panels and a warm bedside lamp for post-workout cool-down.
Mistake: Buying tiny mirror or skipping it
Why it doesn't work: Hard to check form; room feels smaller.
Do this instead: Get a full-length leaning mirror.
Shopping Guide: Where to Find These Items
- For flooring and basic equipment try Amazon searches for quick delivery: rubber gym tiles 4×4 and adjustable dumbbells.
- For affordable cardio, look for compact foldable bikes: foldable exercise bike compact.
- For lighting, start with a small LED hex panel kit and add circadian bulbs.
- For storage solutions, check pegboards and wall hooks: wall mounted pegboard storage 48 inch.
Start with the floor and mirror—those two choices made the biggest day-to-day difference for me. I found switching one item at a time kept costs manageable and let me tweak the layout as I learned what I used most. Which zone will you create first?